Pin it
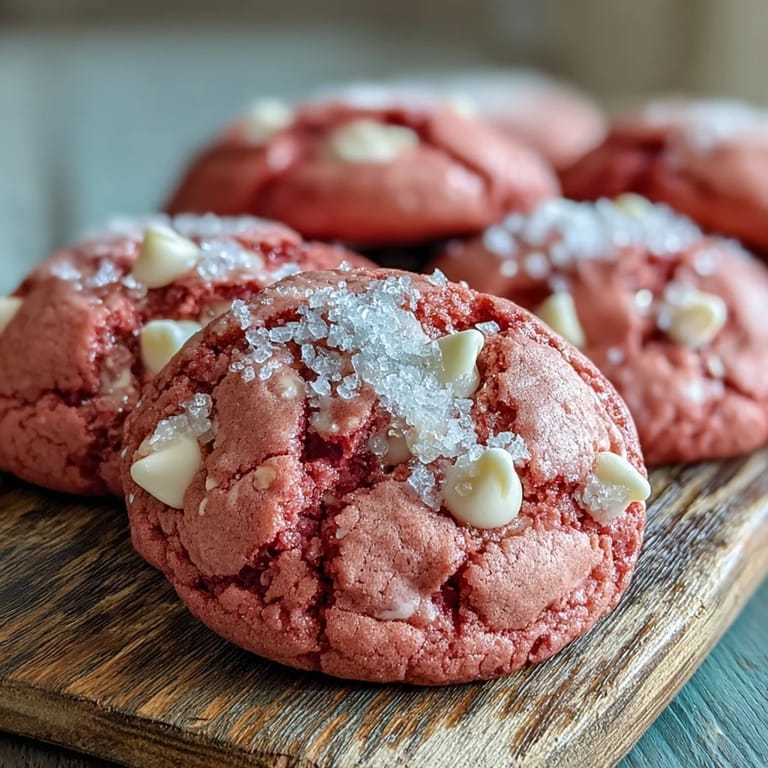
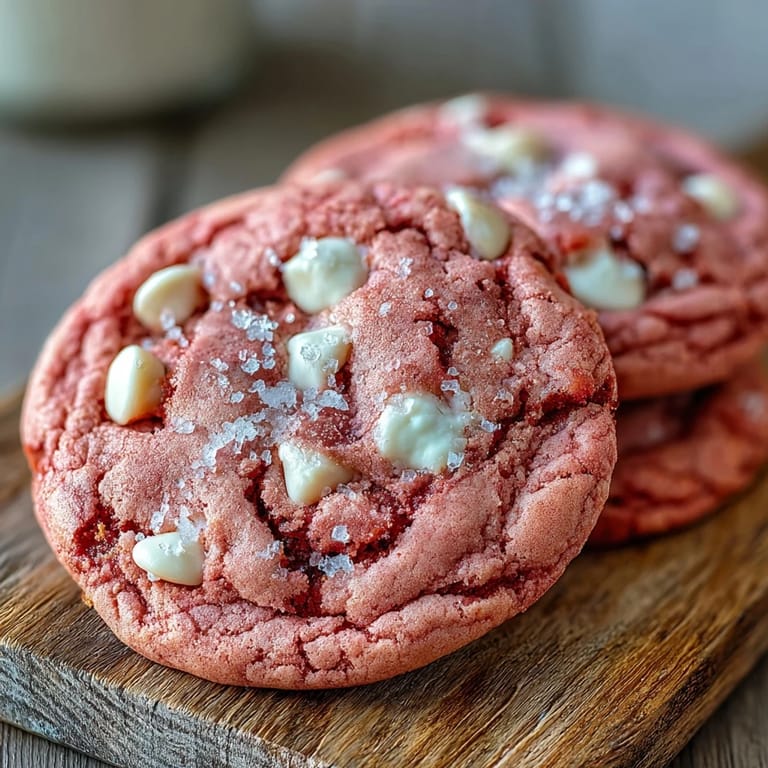
 The first time I made pink velvet cookies, I was actually trying to cheer up a friend who'd had a terrible week at work. Something about the ridiculous color—this vibrant, unapologetic pink—just made us both start laughing before they even came out of the oven. Now they're my go-to whenever someone needs a little joy in dessert form.
Last Valentine's Day, I made three batches back-to-back because my partner kept "accidentally" eating them before I could pack them up for friends. The dough is forgiving enough that you can sneak a spoonful while they're chilling without ruining anything, though I definitely didn't do that multiple times.
Ingredients
- All-purpose flour (2 ½ cups): The structure builder, but don't pack it down or these become cakey instead of chewy
- Baking powder and soda (1 tsp and ½ tsp respectively): This double team gives you those gorgeous crackly tops while keeping centers soft
- Salt (½ teaspoon): Just enough to make the white chocolate pop without tasting savory
- Unsalted butter (1 cup, softened): Room temperature is non-negotiable here—cold butter creates weird dense spots I learned the hard way
- Granulated sugar (1 ½ cups): Creates that perfect crisp edge while the centers stay pillowy
- Large egg: Adds richness and helps bind everything into a cohesive dough
- Vanilla extract (2 teaspoons): Don't skimp here—it's the quiet flavor anchor behind all that pink drama
- Pink gel food coloring (2 teaspoons): Gel gives you that intense color without adding liquid like drops do
- White chocolate chips (1 cup): The creamy counterpoint to all that sugar, and they get gorgeously melty
Tired of Takeout? 🥡
Get 10 meals you can make faster than delivery arrives. Seriously.
One email. No spam. Unsubscribe anytime.
Instructions
- Whisk the dry foundation:
- In a medium bowl, combine the flour, baking powder, baking soda, and salt until everything is evenly distributed. This step takes like thirty seconds but prevents those sad pockets of plain flour in baked cookies.
- Cream butter and sugar:
- Beat the softened butter and sugar together until the mixture looks pale and fluffy, about 2 to 3 minutes. It transforms from grainy to almost silky—that's when you know you've hit the sweet spot for texture.
- Add the wet ingredients:
- Mix in the egg and vanilla until fully incorporated, then add the pink gel coloring and watch the magic happen. Keep mixing until the color is uniform and you have this bowl of bright pink dough that looks impossibly cheerful.
- Combine everything:
- Gradually add the dry ingredients on low speed, stopping the moment you no longer see streaks of flour. Overmixing activates gluten and these become tough instead of tender.
- Fold in the chocolate:
- Gently incorporate the white chocolate chips with a spatula, being careful not to overwork the dough. The marble effect of white against pink is actually part of the charm here.
- Chill the dough:
- Cover the bowl and refrigerate for 30 minutes minimum—this step prevents cookies from spreading into thin, sad puddles. I've tried skipping it and immediately regretted my impatience.
- Prep your baking station:
- Preheat the oven to 350°F and line two baking sheets with parchment paper. The parchment is worth it for easy cleanup and prevents that frustrating stuck-to-the-pan situation.
- Scoop and space:
- Drop tablespoon-sized dough balls onto the sheets, leaving about 2 inches between each one. They'll spread but not excessively, and this spacing ensures even baking.
- Bake to perfection:
- Bake for 10 to 12 minutes until edges look set but centers still seem slightly soft. This is the moment when trusting the process pays off—they firm up beautifully during cooling.
- Cool completely:
- Let them rest on the baking sheets for 5 minutes, then transfer to a wire rack. The center continues cooking slightly during this time, achieving that ideal chewy texture throughout.
 Pin it
 My daughter now requests these for every school event because apparently they're the ones that disappear fastest from the bake sale table. There's something about the color that makes people gravitate toward them before they even taste how good they are.
Making Them Your Own
Sometimes I swap half the white chocolate for dark chocolate chunks when I want something less cloying. The contrast looks stunning and the bittersweet notes cut through the sweetness surprisingly well.
Color Without the Drama
Start with less coloring than you think you need—you can always add more, but once you've gone full neon, there's no going back. I keep a tiny clean spoon specifically for adjusting color mid-mix.
Storage and Sharing
These actually improve slightly after sitting overnight, as the flavors meld and the texture settles into something extraordinary. The only problem is they rarely last long enough to prove this theory.
- Layer between parchment paper if you stack them, or you'll end up with one giant pink cookie blob
- Freeze the dough balls instead of baked cookies if you want fresh-baked convenience later
- Room temperature storage is fine for a week, but the freezer keeps them perfect for months
 Pin it
 Hope these bring as much ridiculous pink joy to your kitchen as they have to mine.
Common Questions
- → How do I achieve the signature vibrant pink hue in these cookies?
The vibrant pink color is achieved by incorporating a few teaspoons of pink gel food coloring into the wet ingredients. You can adjust the amount to reach your desired shade.
- → What's the secret to keeping these cookies soft and chewy?
For a soft and chewy texture, ensure you don't overmix the dough once dry ingredients are added. Also, bake them just until the edges are set and the centers still look slightly soft; they will continue to firm up as they cool.
- → Can I substitute the white chocolate chips with other mix-ins?
While white chocolate chips provide a creamy sweetness, you can certainly experiment. Milk or dark chocolate chips would also work, or even chopped nuts for a different texture. Consider adding extra chips on top before baking for a decorative touch.
- → Why is it important to chill the cookie dough before baking?
Chilling the dough for at least 30 minutes helps solidify the butter, which prevents the cookies from spreading too much in the oven. This ensures they hold their shape better and results in a thicker, chewier cookie.
- → How long can I store these cookies, and what's the best way to keep them fresh?
Store these delectable treats in an airtight container at room temperature for up to one week. This method helps maintain their softness and prevents them from drying out.
- → Are there any flavor variations I can explore?
Absolutely! For an enhanced flavor profile, consider adding half a teaspoon of almond extract or a few drops of rose water along with the vanilla. You can also turn them into cookie sandwiches by filling cooled cookies with cream cheese frosting.